Continuous Integration is a software development practice where members of a team integrate their work frequently, usually each person integrates at least daily - leading to multiple integrations per day. Each integration is verified by an automated build (including test) to detect integration errors as quickly as possible. Many teams find that this approach leads to significantly reduced integration problems and allows a team to develop cohesive software more rapidly.
Using a continuous integration (CI) pipeline is a good practice for any software project. CI lets a developer know immediately if they commit changes that break any unit tests, or decrease test coverage.
Let’s look at how to set up a CI pipeline for open source software written in Go. All the services mentioned here are free (like beer) when used for Free (like freedom) Software projects.
Create project
Start by creating a new repository on Github, naming
it foofinder. Now clone the repo to your local machine:
1 2 | |
Write some code
Create a file foofinder.go with the following content:
1 2 3 4 5 6 7 8 9 10 11 12 13 14 | |
Write a test
Create a file foofinder_test.go with this content:
1 2 3 4 5 6 7 8 9 10 11 12 13 14 15 | |
Now let’s run our test and see if it worked:
1 2 3 4 5 | |
Test Coverage
We can use gocov to ananlyze how much of our
codebase is covered by tests.
Install gocov. Note that gocov has both a library and a CLI, thus the
gocov/gocov path:
1
| |
gocov has several commands. gocov test produces JSON output:
1 2 3 4 5 6 7 8 9 10 11 12 13 14 15 16 17 18 19 20 21 22 23 24 25 26 27 28 29 30 31 32 33 34 35 36 37 38 39 40 41 42 43 44 45 46 | |
The other gocov commands are used to interpret the json output. gocov
report produces a human-readable summary:
1 2 3 4 5 | |
For a more detailed look at your code’s coverage, use gocov annotate. Note
the trailing -:
1 2 3 4 5 6 7 8 9 10 11 12 13 | |
Commit to Github
Now we will commit our new files to the git repository:
1 2 | |
Travis CI
Travis CI is the most popular hosted continuous integration service for open source projects. It is tightly integrated with Github. Travis results are automatically displayed for pull requests, helping to ensure you never accept a PR that fails its tests.
Travis itself is open source, and free for use by open source projects.
However it has some limitations for testing go code - in particular,
gocov cannot currently be used with Travis.
Travis Configuration
Travis reads its configuration from a file in the repository root. Create a
.travis.yml file with this content:
1 2 3 4 5 6 7 8 | |
The before_script section is required because our tests depend on assert,
but the go get command will not automatically fetch packages imported by
*_test.go files.
Add the travis configuration to git:
1 2 | |
Activate Travis
Open https://travis-ci.org in your browser. Click on “Sign in with Github”, in the upper right corner of the screen. If you have never logged in to travis before you will be prompted by Github to grant OAuth permissions to Travis.

Once you are logged in, click on your username in the upper right corner, and choose “Accounts” from the dropdown.

Travis will display a list of all your Github repositories. locate foofinder,
and click the OFF/ON toggle beside it. The toggle will slide to “ON”.

Now we push our commits to Github, which will automatically kick off a Travis build:
1 2 3 4 5 6 7 8 9 10 11 12 13 14 15 16 17 18 19 20 21 | |
In your browser, click on the Travis logo in the upper left corner of the
screen to return to the travis home page. You should now see foofinder in
the “my repositories” sidebar at the left of the screen. Click on it to see
the results of your test run.

Status badge
After all this work comes the reward: a nice, shiny green status badge!
Click on the gear icon and choose “Status Images”:
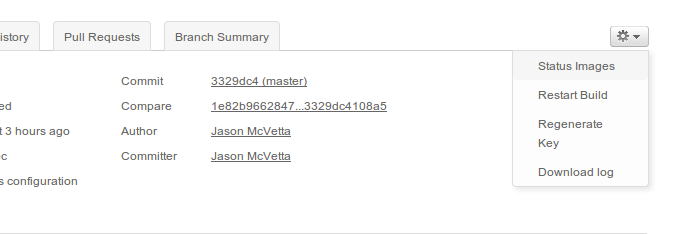
Copy the Markdown link from the ensuing dialog.
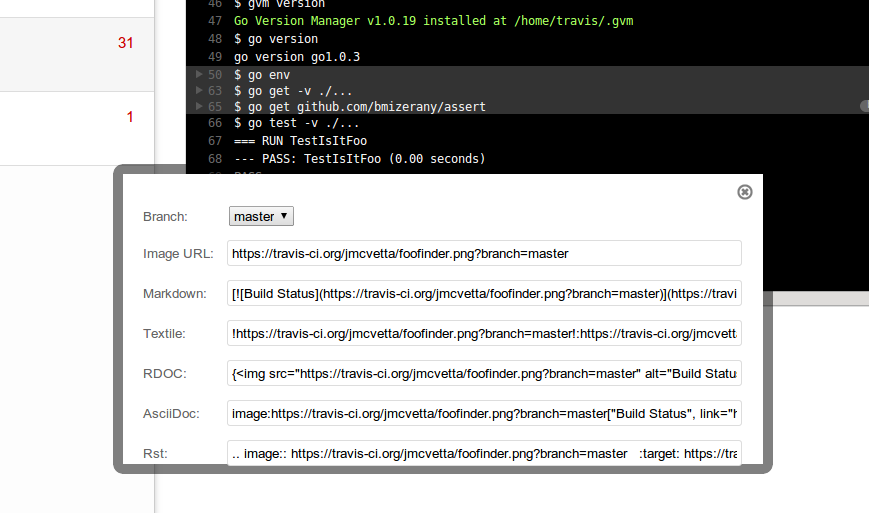
Paste the Markdown into the README.md file:
1 2 3 4 5 6 | |
Commit and push the changes:
1 2 3 | |
Now when you look at the project’s Github page, you will see a status badge that is automatically updated whenever a new build is run on Travis.
![]()
Drone.io
Drone is a hosted continuous integration service, in some
ways similar to Travis CI. Drone provides a more “vanilla” build
environment than Travis, that works great with gocov and friends. Although
Drone itself is proprietary, it is free for use by open source projects. The
backend of Drone is written in Go.
Unlike Travis, Drone does not require a configuration file in the repository. Instead it is configured through its web interface.
Start by opening http://drone.io in your browser. Click “Login” in the upper right of the screen.

On the login page, choose Github from the list of third-party login providers. If you have never logged in to Drone before, Github will prompt you to grant OAuth permissions.

Once you are logged in, click on the “New Project” link at the top of the page.

On the repository setup page, select Github.

Locate foofinder in the list of your repositories, and click “Select”.

Choose Go from the project setup menu.

You will be taken to the build script screen.
It is necessary to go get the assert package required by our tests. Replace
the default build script with this:
1 2 3 4 | |

Click “Save” and you will be taken to the Settings screen. No changes need to be made here.

Click “Build Now” to kick off the first build! Every time a new commit is pushed to Github, Drone will automatically start a build. If everything is setup correctly your build will complete successfully.

Status badge
In your Drone project settings, click on “Status Badges”.

Copy the Markdown, and paste it into your README.md file:
1 2 3 4 5 6 7 | |
Commit and push the changes:
1 2 3 | |
The Drone status badge is now visible on Github!
![]()
Coveralls.io
Coveralls is a hosted code coverage analysis tool. It is free for use by open source projects.
Configure Coveralls
Start by opening http://coveralls.io in your browser. Click “SIGN IN WITH GITHUB” in the upper right corner. If you have never logged in to Coveralls before, Github will prompt you to grant OAuth permissions to Coveralls.

Once you are logged in, click on “Add Repo”.

Coveralls does not automatically refresh its list of your Github repositories. You will need to manually sync it whenever you add a new repo on Github. Click “SYNC GITHUB REPOS”. The operation may take several seconds.

Locate foofinder in the list of repositories, and click the OFF/ON toggle. It
will slide over to ON, and a “VIEW ON COVERALLS” button will appear. Sometimes
it may be necessary to refresh the page to see the button.

Click “VIEW ON COVERALLS” and you will be taken to the setup page. Locate the REPO TOKEN in the TECHNICAL DETAILS section. Copy the token to your clipboard.

Add goveralls to Drone config
Now we need to push some test coverage data to Coveralls. We will do this by
adding goveralls, a Coveralls client for Go code, to our Drone build script.
We must use Drone because goveralls calls gocov, which is not supported on
Travis CI.
Return to the Drone settings for foofinder, and update the Commands section
to call goveralls:
1 2 3 4 5 6 7 8 | |
Then paste your Coveralls Repo Token into the Environment Variables section like this:
1
| |
Note, the Environment Variables of a Drone project are not visible to the public, but the Commands are.

Click “Save”, then click “Build Now” to kick off a new build. If everything is set up correctly, the build will display a Coveralls job link when it completes.

Refresh your project’s Coveralls page, and you will see code coverage data!
Note the coverage percentage calculated by Coveralls sometimes disagrees with
that calculated by gocov report. Afaik this has to do with how they count
“meaningful” lines of code.

Click on the build number - in this case, “#1” - to explore coverage in the build.

By clicking on an individual file name, you can view color coded code coverage for that file.

Status Badge
On your project’s Coveralls page, click the “Get Badge URLs” link, just below the color-coded “coverage” badge. Copy the Markdown from the ensuing popup:
![]()
Paste the Markdown into your README.md file:
1 2 3 4 5 6 7 8 | |
Commit and push the changes:
1 2 3 | |
The coverage badge is now visible on Github!
![]()
Uh-oh, that badge is red. Not-so-shiny. :( We better get to work improving our test coverage!
